มารู้จักกับ OpenIddict กันดีกว่า
หลายๆ คนคงจะเคยได้ยินเกี่ยวกับ Authentication & Authorization server กันมาแล้ว หรือบางคนอาจจะเคยได้ทำ อาจจะด้วย C# .NET เอง หรืออาจจะภาษาอื่นก็ตาม แต่ใน blog นี้จะมาพูดถึง Library ตัวนึงที่เป็นทางเลือกในการทำ Authorization Server สำหรับ .NET
OpenIddict เป็น opensource project และเป็น framework สำหรับสร้าง authorization server โดยอิงตามมาตราฐาน OAuth 2.0 / OpenID Connect (OIDC) สำหรับ ASP.NET และ ASP.NET Core โดย OpenIddict นั้นจะเจาะจงแค่การตรวจสอบสิทธิ์การเข้าถึงทรัพยากรของเซิฟเวอร์เท่านั้น หรือ Authorization นั่นเอง ส่วนในเรื่องการตรวจสอบความถูกต้องของผู้ใช้งานนั้น หรือ Authentication นั่นจะไม่ได้เกี่ยวกับ OpenIddict ไม่ว่าจะเป็นการตรวจสอบแบบใดก็ตาม ก็สามารถเอามาใช้ร่วมกับ OpenIddict ได้ เช่น username password, access token หรือจะเป็น windows authentication ก็ตาม
โดยใน Blog นี้จะนำ .NET 7 โดยใช้ ASP.NET Core project template มาอิงเป็นตัวอย่าง
Required Dependencies:
- OpenIddict.AspNetCore
- OpenIddict.EntityFrameworkCore
- Microsoft.EntityFrameworkCore.Sqlite
- Microsoft.EntityFrameworkCore.Design
Note: ผมเลือกที่จะใช้ Sqlite มาใช้ในตัวอย่าง ซึ่งง่ายสำหรับคนที่ต้องการจะ checkout code ไป run เองโดยไม่ต้องไป setup ตัว database อื่นๆ
Create and configure project
สร้าง DbContext
public class ApplicationDbContext : DbContext
{
    public ApplicationDbContext(DbContextOptions<ApplicationDbContext> options) : base(options) { }
}
เพิ่ม ConnectionString ที่ appsettings.json
{
  "ConnectionStrings": {
    "DefaultConnection": "DataSource=Database\\app.db"
  }
}
เรียกใช้งาน EntityFramework ใน Program.cs
var builder = WebApplication.CreateBuilder(args);

var connectionString = builder.Configuration.GetConnectionString("DefaultConnection");
builder.Services.AddDbContext<ApplicationDbContext>(options =>
{
    // Configure Entity Framework Core to use Microsoft Sqlite.
    options.UseSqlite(connectionString);

    // Register the entity sets needed by OpenIddict.
    options.UseOpenIddict();
});
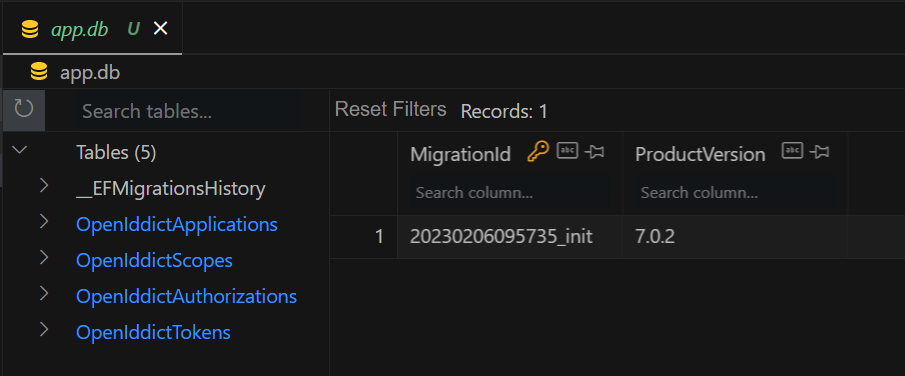
รัน EF Migrations command เพื่อสร้าง Database และ Table
dotnet ef migrations add init
dotnet ef database update
หลังจาก migrations เสร็จก็จะได้ Sqlite database และ tables ตามรูป โดยผมใช้ SQLite Viewer Extension สำหรับ VS Code เพื่อเอาไว้ดูข้อมูลใน database ที่เป็น Sqlite
เรียกใช้งาน OpenIddict ใน Program.cs
โดยใน Blog นี้เราจะพูดถึงการ authorize ด้วย client credentials เท่านั้น ซึ่ง client credentials นั้นจะเป็นการใช้ client_id และ client_secret ในการขอ token สำหรับ authorize เวลาเรียกใช้งาน resource ต่างๆ เช่น API
builder.Services
        .AddOpenIddict()
        .AddCore(options =>
        {
            options.UseEntityFrameworkCore()
                   .UseDbContext<ApplicationDbContext>();
        })
        .AddServer(options =>
        {
            options.SetTokenEndpointUris("connect/token");

            options.AllowClientCredentialsFlow()
                   .AllowRefreshTokenFlow();

            options.AddDevelopmentEncryptionCertificate()
                   .AddDevelopmentSigningCertificate();

            options.RegisterScopes("api");

            options.UseAspNetCore()
                   .EnableTokenEndpointPassthrough();
        })
        .AddValidation(options =>
        {
            options.UseLocalServer();
            options.UseAspNetCore();
        });
Configure Authorization Policy
เนื่องจาก access_token นั้นถูกสร้างจากการ authentication ด้วย OpenIddict เพื่อให้ access_token สามารถ authorized ผ่าน policy ได้จำเป็นจะต้องระบุ authentication scheme โดยใช้ OpenIddictValidationAspNetCoreDefaults.AuthenticationScheme และเรายังสามารถระบุ scope ของ policy ผ่านจาก claims ของ token ได้อีกด้วย
builder.Services.AddAuthentication().AddJwtBearer();

builder.Services.AddAuthorization(options =>
{
    options.AddPolicy(
        "ClientCredentialsPolicy",
        policy => policy
            .RequireAuthenticatedUser()
            .RequireClaim(Claims.Scope, "api")
            .AddAuthenticationSchemes(OpenIddictValidationAspNetCoreDefaults.AuthenticationScheme));
});
เพิ่ม Authorization Endpoint
โดยใน Blog นี้จะจัดการ Authorization ในรูปแบบของ Minimal API แทนการใช้ Controller เนื่องจากไม่ได้มีการเรียกใช้ View หรือส่วนของ UI ดังนั้น Minimal API จึงเพียงพอที่จะนำมาใช้
โดยที่ url path นั้นจะต้องตรงกับที่เราประกาศใน OpenIddict Service เพื่อให้ client สามารถเรียกเข้ามาขอ token สำหรับการ authorize ในการใช้ api ได้ โดยที่ client_id และ client_secret นั้นจะถูกตรวจสอบอัตโนมัติผ่าน OpenIddict service โดยที่เราไม่ต้อง implement เอง
app.MapPost("/connect/token", async (HttpContext context, IOpenIddictApplicationManager applicationManager) =>
{
    var request = context.GetOpenIddictServerRequest();
    if (!request.IsClientCredentialsGrantType())
    {
        throw new NotImplementedException("The specified grant is not implemented.");
    }

    var application = await applicationManager.FindByClientIdAsync(request.ClientId) ??
        throw new InvalidOperationException("The application cannot be found.");

    var identity = new ClaimsIdentity(TokenValidationParameters.DefaultAuthenticationType, Claims.Name, Claims.Role);

    identity.AddClaim(Claims.Subject, await applicationManager.GetClientIdAsync(application));
    identity.AddClaim(Claims.Name, await applicationManager.GetDisplayNameAsync(application));
    identity.AddClaim(Claims.Scope, "api");
    identity.SetDestinations(GetDestinations);

    return Results.SignIn(
        principal: new ClaimsPrincipal(identity),
        properties: null,
        authenticationScheme: OpenIddictServerAspNetCoreDefaults.AuthenticationScheme);
});

static IEnumerable<string> GetDestinations(Claim claim) => claim.Type switch
{
    Claims.Name or Claims.Email or Claims.Role => new[] { Destinations.AccessToken, Destinations.IdentityToken },
    _ => new[] { Destinations.AccessToken }
};
สร้าง ClientCredentials สำหรับ OpenIddict
เนื่องจาก OpenIddict จำเป็นต้องรู้ก่อนว่า client ที่ต้องการเข้ามาขอ token นั้นมี credentials ที่ถูกต้องหรือไม่ ผมก็จะใส่ credentials data ของ client เข้าไปใน application pipeline ใน program.cs เลย
await SeedClientCredentials(app.Services);

static async Task SeedClientCredentials(IServiceProvider serviceProvider)
{
    using var scope = serviceProvider.CreateScope();

    var context = scope.ServiceProvider.GetRequiredService<ApplicationDbContext>();
    await context.Database.EnsureCreatedAsync();

    var manager = scope.ServiceProvider.GetRequiredService<IOpenIddictApplicationManager>();

    if (await manager.FindByClientIdAsync("aixasz-client") is null)
    {
        await manager.CreateAsync(new OpenIddictApplicationDescriptor
        {
            ClientId = "aixasz-client",
            ClientSecret = "f128d22c-412d-469e-94c0-e1eb366e7f1b",
            DisplayName = "Aixasz Sample OpenIddict ClientCredentials",
            Permissions =
            {
                Permissions.Endpoints.Token,
                Permissions.GrantTypes.ClientCredentials
            }
        });
    }
}
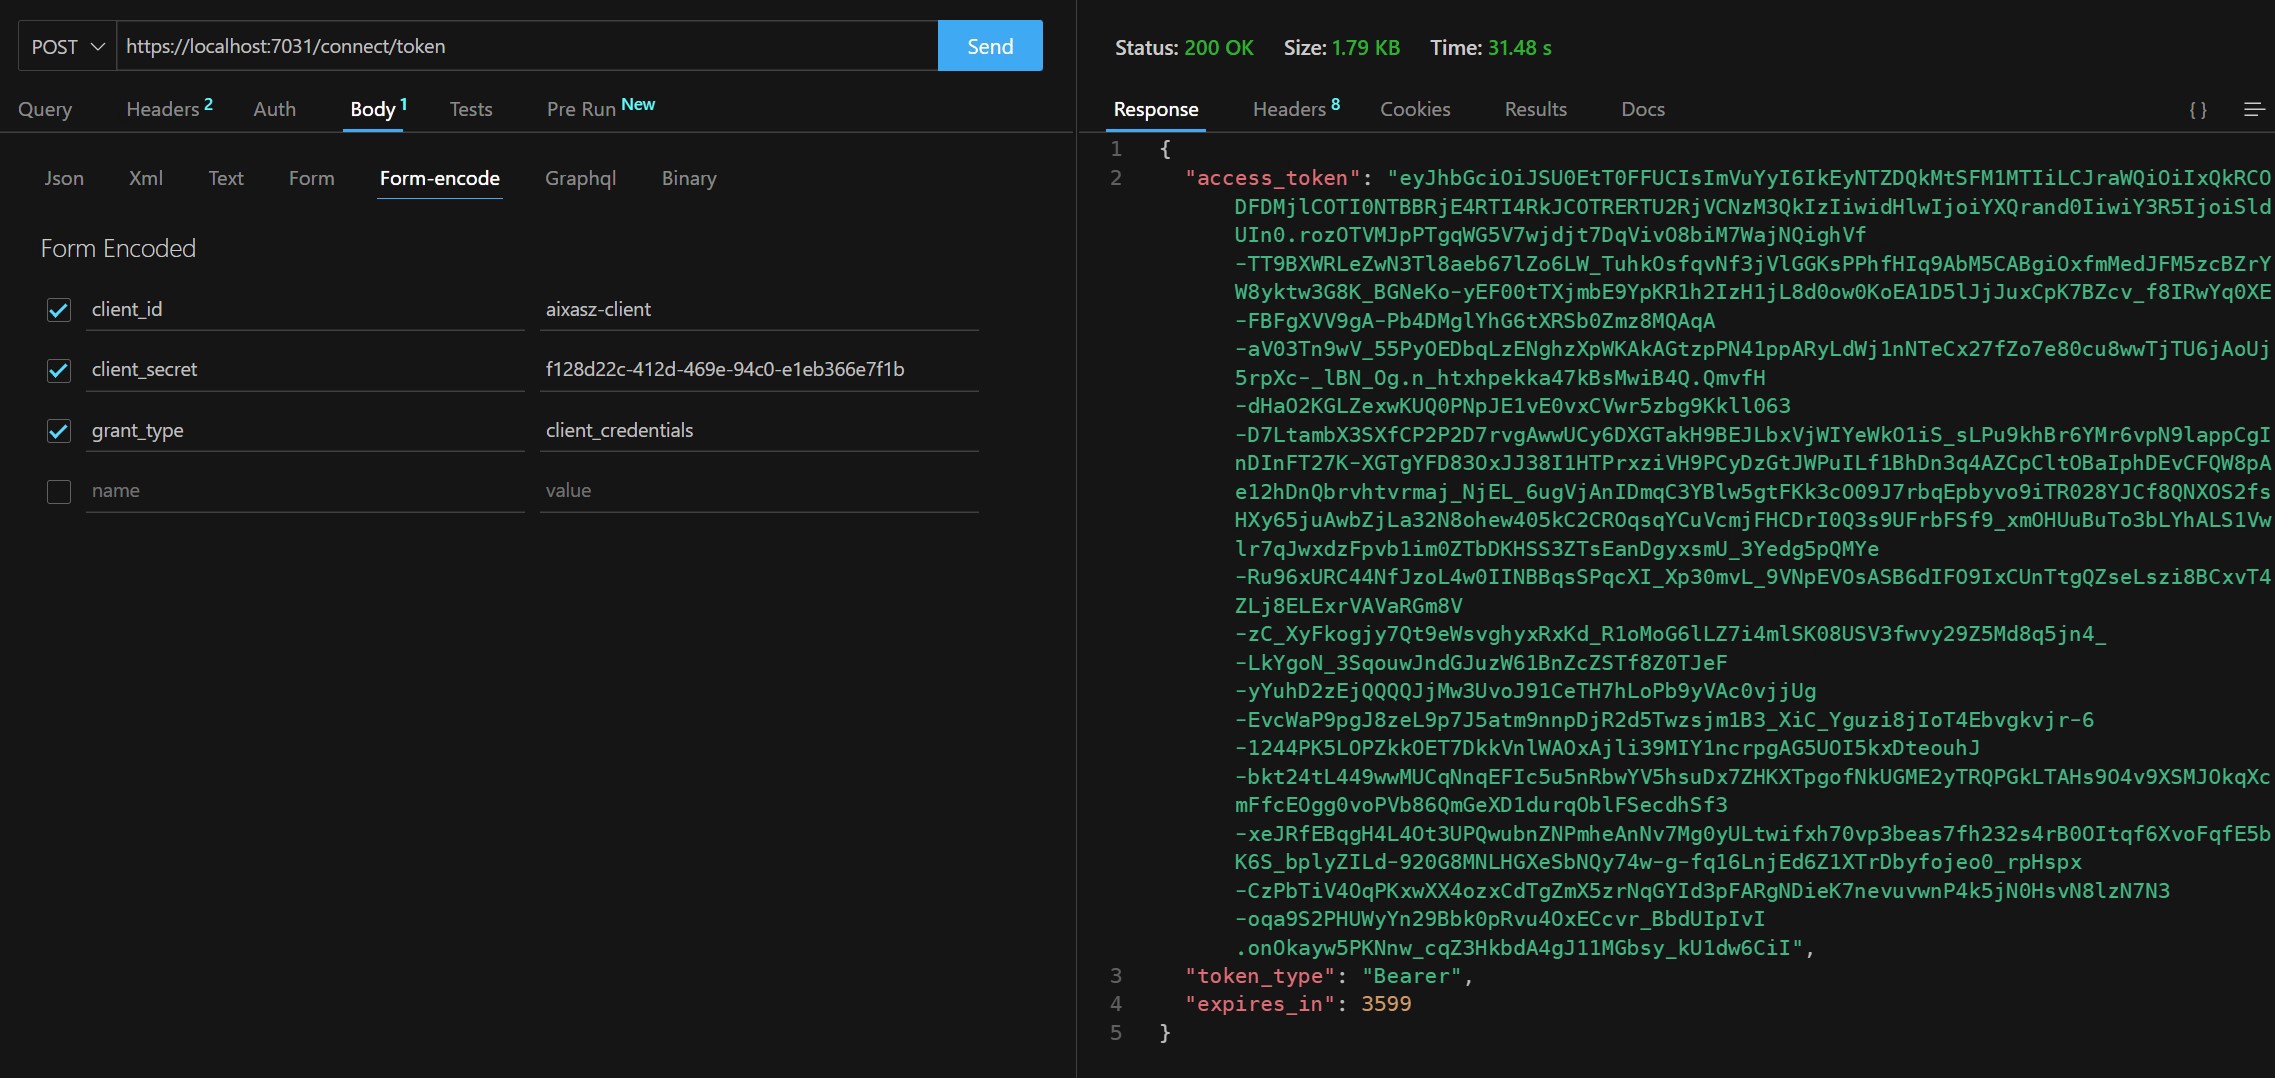
Generate access_token ด้วย ClientCredentials
โดยผมจะใช้ Thunder Client Extension บน VS Code ในการขอ access_token
เพียงระบุ client_id, client_secret และ grant_type ใน Form-Encode จากนั้น POST ไปที่ token endpoint ที่เรา configure ไว้ เท่านี้เราก็จะได้ access_token สำหรับ Authorize แล้ว
Authorize API endpoint ด้วย access_token จาก OpenIddict
ก่อนอื่นก็ต้องสร้าง API endpoint
โดยยังคงใช้ Minimal API และใส่ extension method สำหรับ request ที่มี authorization และระบุ policy ที่เราได้กำหนดไว้
app.MapGet("/version", () => "v1")
   .RequireAuthorization("ClientCredentialsPolicy");
ทดสอบ Request โดยไม่ใช้ access_token
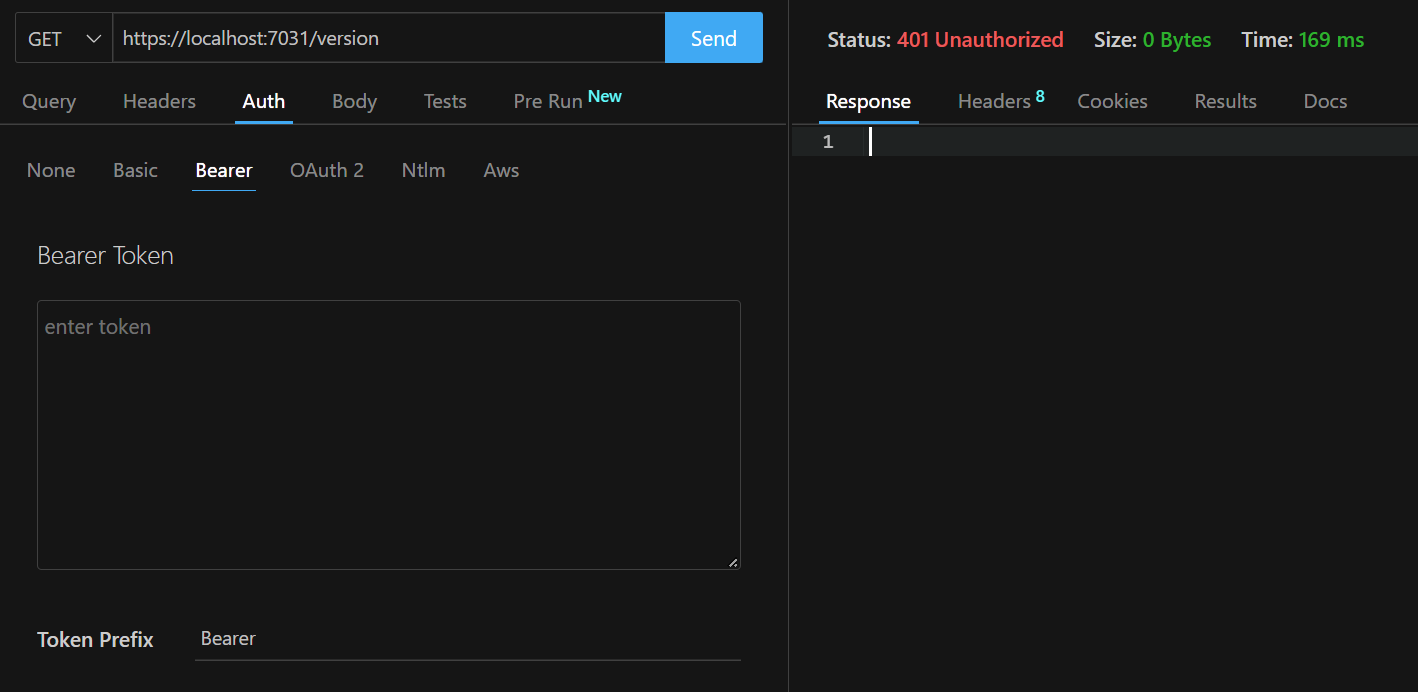
จะเห็นได้ว่า Server นั้นตอบ Status: 401 Unauthorized กลับมา
ทดสอบ Request ด้วย access_token ที่ authentication ผ่าน OpenIddict
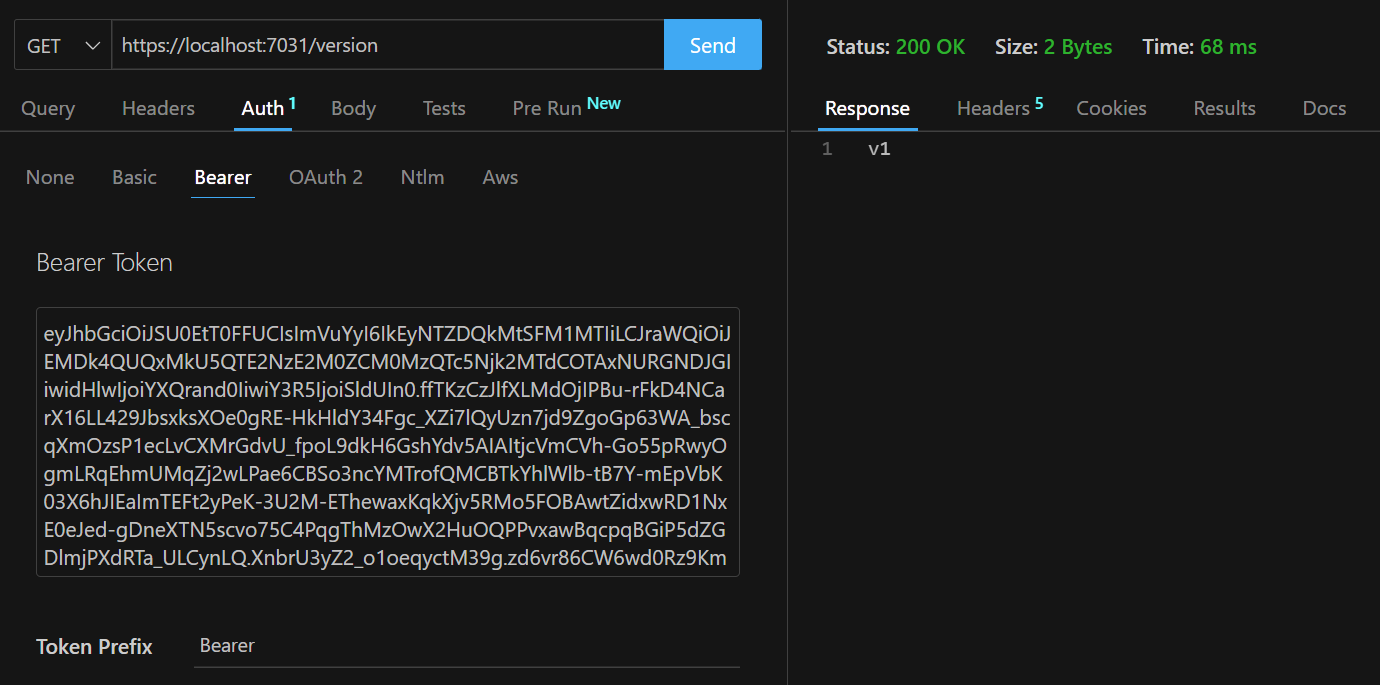
เท่านี้เราก็สามารถ authorized ได้แล้ว
เพิ่มเติม
ในส่วนของ OpenIddict นั้นยังสามารถทำ Authorization ด้วย flows อื่นๆ ได้ เช่น Password Credentials Flow หรือ Authorization Code Flow และ Flow อื่นๆได้อีก ซึ่งเราจะมาพูดถึงกันใน EP ถัดไป